

The dilemma & challenges of painting water; harnessing a medium that acts like water – but maintains the visual stasis, once the product has dried;
[…]and so, *fanfare music* introducing Encaustic Wax Painting…
***the final effect is quite beautiful; the intrinsic blending & conjoining of multiple shades is, well…magical.
With Encaustic Waxes, you can attempt to manipulate the final meshing of the colours – there is also a heavy influence of chaos and pure chance; a reliance on the medium’s properties and its’ reactions to the applied techniques. I love when the medium takes over and the artist (me), becomes a mere facilitator.
It may seem like extra work…but, trust me, you will need a large range of colours; vastly differing from light to dark. This will ensure a more dramatic visual impact.
MAKING THE WAX IS QUITE SIMPLE…
TOOLS & SUPPLIES:
Flat hotplate
Foil piecases (small)
Metal spoons
Old paint Brushes
2.5 cubic inches of beeswax (per colour)
Oil paints in chosen colours (1 Teaspoon per colour)
1 Tablespoon of Wax Medium per colour (here)
STEPS:
STEP 1) In each of the foil casings place:
- 2.5 cubic inches of beeswax (per colour)
- Oil paints in chosen colours (1 Teaspoon per colour)
- 1 Tablespoon of Wax Medium per colour
STEP 2) Put all the prepped foil-casings onto the hotplate (on a low-medium temp) & allow to melt.
STEP 3) Stir them all, using a metal spoon (ensure you’re cleaning your utensil in-between colours; stir until all ingredients are mixed thoroughly (***you will need to continue mixing the waxes throughout the process; ensuring each colour is evenly mixed).

***The canvas you wish to use must be able to handle high temperatures (wood is perfect).
PAINTING WITH ENCAUSTIC WAXES…
- When applying the wax, don’t be shy; liberally apply, because too little & the wax merely soaks into the wood; because wood absorbs liquid up to its’ natural saturation point)
- You should apply the lightest layer first – & darkest last…followed by the addition of a few highlights of the lightest colour (after-the-fact). You should generally align the lightest colour, next to large patches of the darkest colour.
- Once all layers are applied; I had concocted twelve colours in total & if you counted the colour layers in a single spot, you would find, perhaps six-seven colours overlapped each other…the total wax thickness will be about 5-6mm thick. *THE OVERALL EFFECT, AT THIS POINT, WILL LOOK CHUNKY & UNFINISHED – DON’T WORRY, THIS IS ABOUT TO CHANGE…

- You can add more accents, shadows & highlights at any point.
- Continue warming & blending the wax, section-by-section, until complete. Using a heat gun (on the lowest setting), begin to warm the wax in 30cm squared sections. Keep the heat gun at a distance and try to heat the wax evenly.
- Once the wax begins to glisten slightly, bring the heat gun in close to the surface and start manipulating & blending the colours with the force of the hot air & utilising gravity, by changing the angle of the canvas.

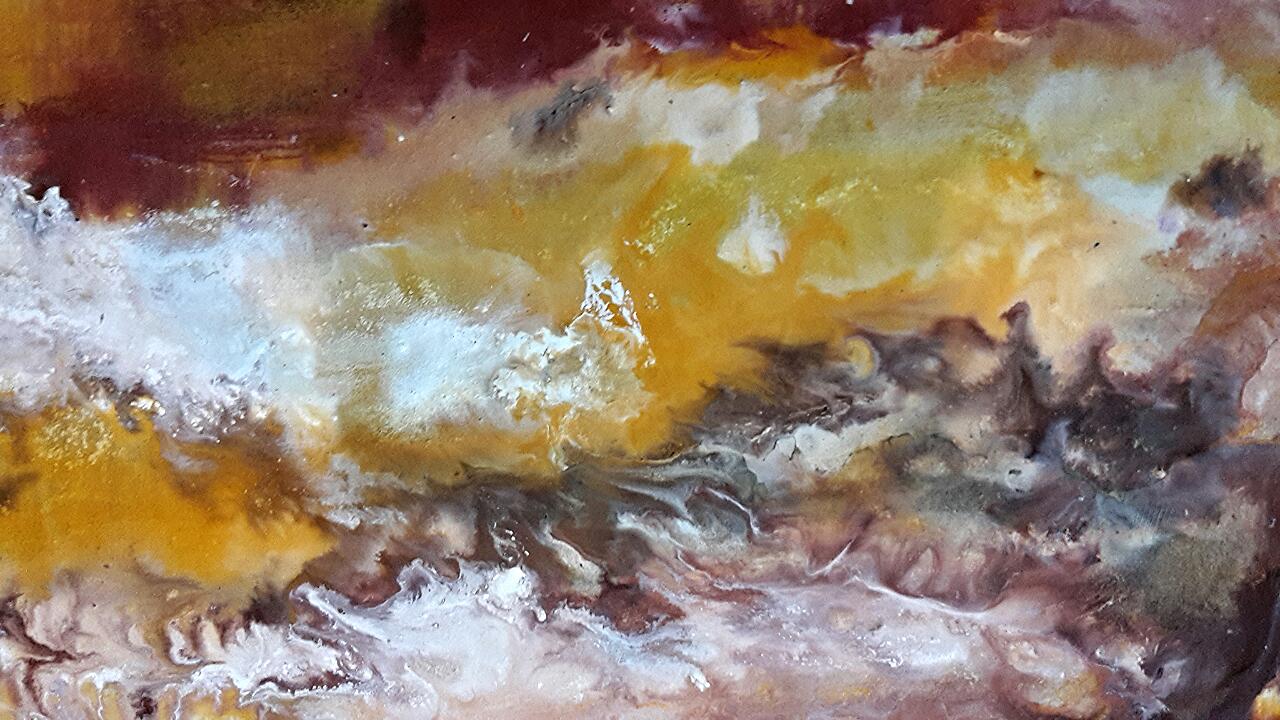


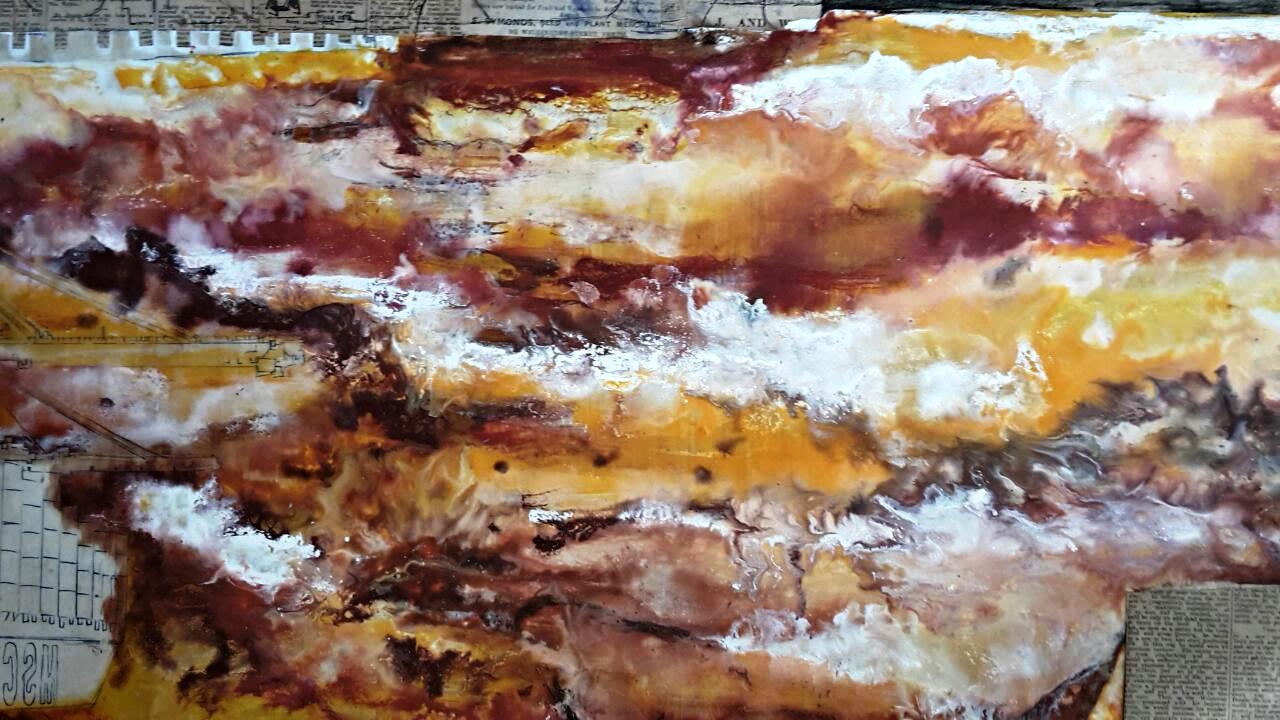

(***art pieces depicted are unfinished)
